
PART 1: THE WARP EFFECT
It isn’t particularly a specific effect
Like customizable xLight Effects such as the DMX, Gladiator Effect, Servo, and State...
The Warp effect works pretty much like the layer blending tool with the in-transition and out-transition... Working hand-in-hand, and together
You can literally place it wherever you like... For any length that you want it for, and with any effect underneath it, for any specific time length on the sequencing screen. It works just like any other effect. The only difference is that it is controlled by being placed down location-wise on the sequencing screen with a transition or transition In and Out.
Lastly, did you know that there are nine (9) different Warp Types? And that all of them share the same treatment but some are just always on Constant, while some on In and Out.
Learn more about the amazing features that make the Warp Effect a very unique tool!
PART 2: THE WARP EFFECT
There are several sliders below the Warp Types, which include: the X and Y sliders, the Circle Count Slider, the Speed Slider, and the Frequency Slider.
Like you may already know, there are value curves on the X and Y Sliders that can be used to adjust the effect to a new display. That of Y goes from top to bottom, giving you a better picture.
Next is the Circle Count Slider. When the Warp Effect is activated and set to 'dissolve', on a 'constant' treatment, it gives a totally different view when the Circle Count is either adjusted low or high. The Circle Count could be set 'in' or 'out' but you would notice that whenever it is not set to 'Constant', everything comes out differently. There would be no option of changing it to any kind of speed. The only change you would have to do is make the effect smaller.
Discover how the Frequency Slider can be used to create a ripple effect on a low or high frequency.
The 'ripple', on the other hand, isn't available to all the Sliders. Speed and Frequency Sliders have it available to them. When either Slider is adjusted to the low end, on a smaller matrix, you'd see the ripple effect and if you adjust the Sliders to the higher end, you'd see a little bit more rippling. Ripple gives an interesting effect to the 'Butterfly' especially.
At the end of this video, you would have learned:
- About the treatment dropdown menu;
- Why a ‘Constant Treatment’ is recommended when creating a Pro Warp Effect. What to do when sequencing; the visual representation of the in-, free-ride and out-periods and more!
- Pro Tips on how to maximize your Layer Blending configuration in both the Canvas and Layers modes. Color pallets, Warp Type,
And more!
PART 3: THE WARP EFFECT
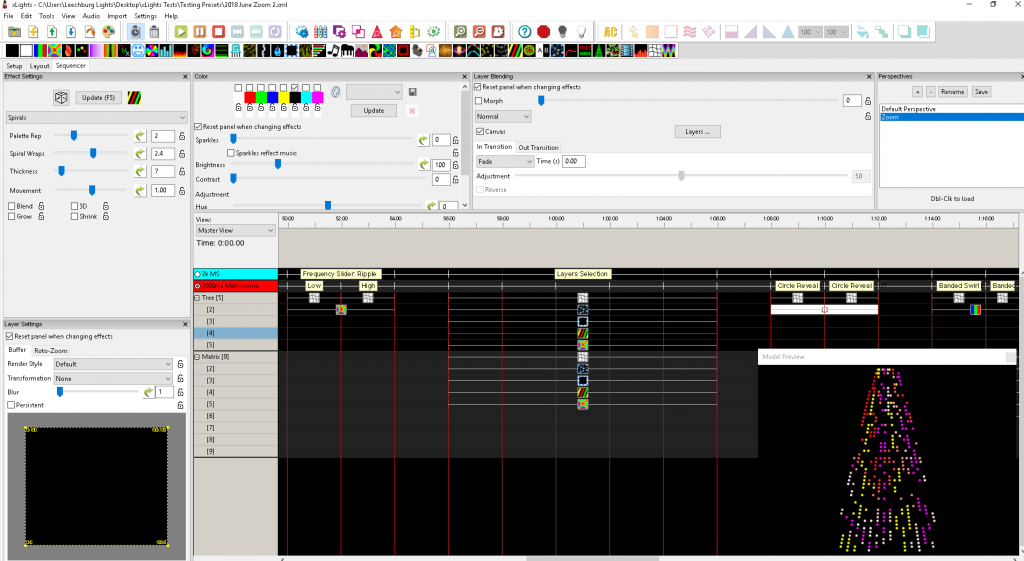
In this concluding part, you will learn hands-on pro tips about some of xLights stunning Warp effects such as the Circle Reveal-In, Circle Reveal-Out, Banded Swirl In, Banded Swirl Out Ripple –In and -Out, Single Water Drop: Constant Only, X, Y-axis.
Discover how to add more color and speed variation to enhance the effects.
You will also learn how the Cycle Count Slider, Roto-Zoom and Transitions, Transition in- and –out, sparkles, etc can be applied to create stunning effects in xLights.